FAQFAQ   SearchSearch   MemberlistMemberlist   UsergroupsUsergroups   RegisterRegister   ProfileProfile   Log in to check your private messagesLog in to check your private messages   Log inLog in 
Basic Sig Tutorial - With Photoshop

 
Post new topic   Reply to topic    Bloodfist [SoD]'s Board Forum Index -> Tutoriale
View previous topic :: View next topic  
Author Message
Bloodfist
Forum Guardian
Forum Guardian
Bloodfist

Joined: 26 Oct 2007
Posts: 758
Location: Underworld

PostPosted: 21/12/2007 16:32    Post subject: Basic Sig Tutorial - With Photoshop Reply with quote

Matierals Needed:
1) Photoshop.

2) Half a brain. That's right half a brain, if you have a whole brain, then go to a neurologist right this minute.

3) Some descent custom brushes. You can get these brushes from www.deviantart.com

Now, let us begin.

Create a new document 350px x 150px with a white background.

Fill the white background with black.

Use a few custom brushes (abstract fractal and grunge are my fav.) on a new layer. With the foreground color set to white, and a 50% brush opacity. Tip: Try switching between black and white and adding numeroase layers to get an even better result. I got this as a result:
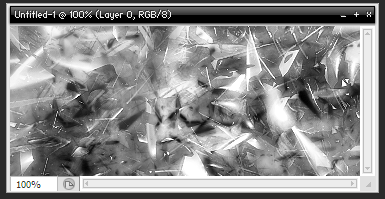
Basic Sig Tutorial - With Photoshop Basic Sig Tutorial - With Photoshop

Now its time to add some color, go to Layer, New Adjustment Layer, Color Balance, then move the arrows up and down til u find a color you like I used the following combination in the midtones section +100 +18 -72.
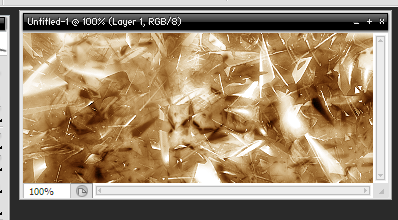
Basic Sig Tutorial - With Photoshop Basic Sig Tutorial - With Photoshop

I ended up with the following:

Now its time to add a render to you sig. Pick out a render you like from a render site (here's mine):
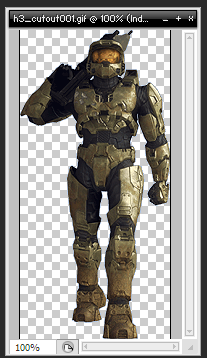
Basic Sig Tutorial - With Photoshop Basic Sig Tutorial - With Photoshop

and then copy and paste the part of the render you want to add to your sig using the rectangular selection tool.

Next, you'll want to select some kind of selection tool, then right click (while your new render layer is selected) on a part of your render and then click free transform. Constrain your render to fit your sig to your liking. I got the following:
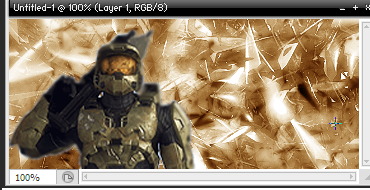

Basic Sig Tutorial - With Photoshop Basic Sig Tutorial - With Photoshop

Now we blend the render into the sig. The way I go about this is by getting out a custom abstract or grunge brush and start brushing the edges and whatnot of the render layer. I ended up with this:
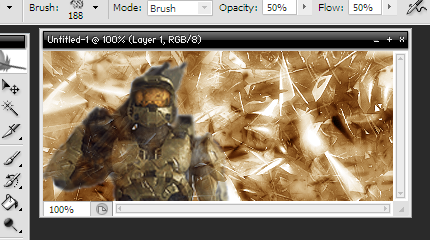
Basic Sig Tutorial - With Photoshop Basic Sig Tutorial - With Photoshop

Now that you have a nice clean render and background, try putting the render layer under the color adjustment layer (sometimes it looks better, sometimes it doesnt)

Add some text with a font of your choice, I used "Mael" at 18 pt, and got this result:
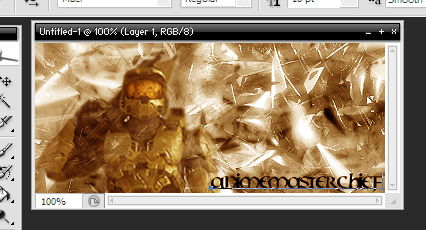
Basic Sig Tutorial - With Photoshop Basic Sig Tutorial - With Photoshop

Now comes a very important part of adding text. Blending options. If you don't know how to get to blending options, simply right click your layer and go to blending options. Play with these options till you get something that you think blends with your sig. I used the following on default (Except for stroke which I set to 1px, and I changed the colors around a little.):
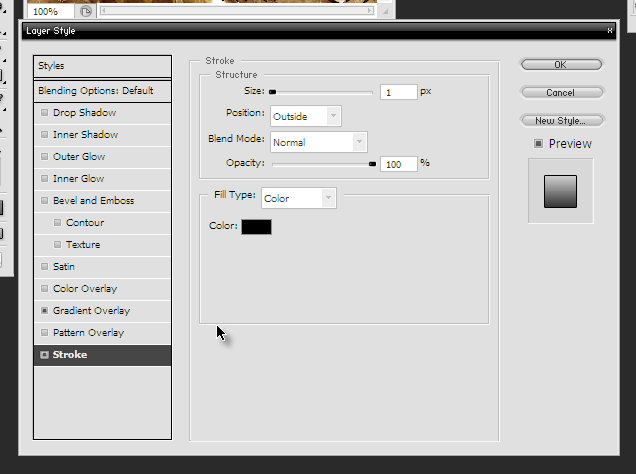
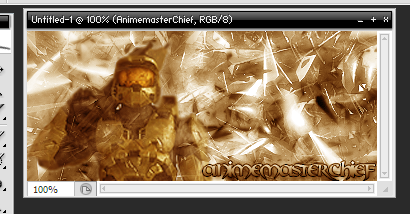
Basic Sig Tutorial - With Photoshop Basic Sig Tutorial - With Photoshop

Basic Sig Tutorial - With Photoshop Basic Sig Tutorial - With Photoshop

Now, finally you are done. If you wish to add multicolor or a pixel-stretch background, how to blend renders in other ways or more tutorials visit my forum or keep looking on Des's cause I'm getting very active. Look for more soon!
_________________
<center>Basic Sig Tutorial - With Photoshop Basic Sig Tutorial - With Photoshop
Basic Sig Tutorial - With Photoshop Basic Sig Tutorial - With Photoshop
Basic Sig Tutorial - With Photoshop Basic Sig Tutorial - With Photoshop</center>
Back to top
View user's profile Send private message
Display posts from previous:   
Post new topic   Reply to topic    Bloodfist [SoD]'s Board Forum Index -> Tutoriale All times are GMT + 2 Hours
Page 1 of 1

 
Jump to:  
You cannot post new topics in this forum
You cannot reply to topics in this forum
You cannot edit your posts in this forum
You cannot delete your posts in this forum
You cannot vote in polls in this forum


Powered by phpBB © 2001, 2002 phpBB Group
Fa-ti si tu propriul forum GRATUIT, pe www.myforum.ro