| View previous topic :: View next topic |
| Author |
Message |
Bloodfist
Forum Guardian

Joined: 26 Oct 2007
Posts: 758
Location: Underworld
|
 Posted: 21/12/2007 16:21 Post subject: Mario Signature Tutorial |
 |
|
Tutorial Name: Mario Signature
Created by: Tidus
Program used: Adobe Photoshop
Notes: A friend of mine made this tutorial a while ago and said I could repost it. I think its a good tutorial and helps those who are still getting new to photoshop. This tutorial is copyrighted to him and shouldn't be reposted by others unless you have his permission.
Tidus's Second Tutorial
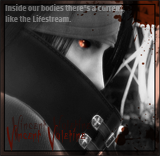
This is the ending result that you should get after you have completed this tutorial.

1) Okay, the first step is open a new document thats 385x115. You can use whatever size you want but
I prefer using this size. Fill the layer with black.

2) Next step, I made a new layer and filled it with negru again and I did the following:
Filter > Render > Lens Flare and got this.

3) My next step that I did was that I took out my render and resized it to a good size for my
signature. I placed it in a good direction then I took out a chalk brush and added the the following
settings:
Size Jitter - 100
Roundness Jitter - 100
Angel Jitter - 100
Minimum Roundnexx - 5
Scattering
Scatter - 118
Count - 1
Count Jitter - 10
I just smudged the edges lightly and this is my outcome so far.

4) Next I added the autentic render layer on top like so.

5) Next I added a nice color c4d render and changed the blending mode to screen.
*Hint: Try find a nice flow for your c4d and erase parts you don't like.

6) Then add another c4d render on screen and erase parts you don't like.

7) Then I added a nice green c4d and set it to linear dodge.

8) Next I made a new layer and took out a hard round brush. Then I just made circles over the
signature were places looked empty, then I took out my smudge tool with the settings from earlier.
Then smudge them a little then I used the following filter:
Filter > Distort > Wave
and then
Filter > Distort > Ripple
Then I set the layer to soft light or you can use overlay. Then I dupliced that layer and moved it
around some.

9) For the next step I added a gradient map. I used harmonies one gradient map then set it to
multiply. I then added another gradient map of the same harmonies one gradient and set that one to
soft light.
*Note: I used the first gradient in the harmonies gradients its the pastel lookin one.
Then I added anot her gradient map, this time black and white. I set it to multiply and lowered the
opacity to around 50% then added a brightness and contrast layer.
My outcome:

10) Next I mabde a new layer and took out a soft brush. Then I just brushed some white where I
wanted some light and set that layer to soft light.

11) For my next step I made a new layer then went to:
Image > Apply Image
Then I use a gaussian blur at about 2 px. then set this layer to lighten and erased a little over
the face.

12) For my next setp I did another new layer.
Image > Apply Image
and then
Filter > Sharpen > Sharpen
and then
Edit > Fade Sharpen
Fade it to 100% then I erased parts that looked to sharp.

13) The final steps just involve adding text and a border. Then you are finished.
Here's my final result:
_________________
<center>





 </center> |
|
| Back to top |
|
 |
|
|
You cannot post new topics in this forum
You cannot reply to topics in this forum
You cannot edit your posts in this forum
You cannot delete your posts in this forum
You cannot vote in polls in this forum
|
Powered by phpBB © 2001, 2002 phpBB Group
Fa-ti si tu propriul forum GRATUIT, pe www.myforum.ro |


 FAQ
 Search
 Memberlist
 Usergroups
 Register
 Profile
 Log in to check your private messages
 Log in


